Villager Breeding Blues: Why Your Minecraft Population Isn’t Booming
Frustrated that your Minecraft villagers aren’t creating the thriving community you envisioned? You’re not alone. The seemingly simple act of encouraging villagers to breed can be surprisingly complex, with numerous factors influencing their willingness to ‘love’. This comprehensive guide dives deep into the mechanics of villager breeding, covering everything from the essential requirements to troubleshooting common issues. We’ll explore the intricacies of beds, food, workstations, and villager moods, ensuring you have all the knowledge needed to create a booming villager population in your Minecraft world. Prepare to transform your village from a sleepy hamlet into a bustling metropolis!
Understanding the Core Mechanics of Villager Breeding
At its heart, villager breeding in Minecraft is governed by a set of rules that dictate whether villagers are willing and able to produce offspring. Understanding these rules is crucial for successful breeding. The key factors include:
- Beds: Each villager, including baby villagers, must have a valid bed assigned to them. An unclaimed bed is essential for breeding to occur.
- Food: Villagers need to be willing to breed. Willingness is achieved by providing them with sufficient food.
- Workstations: While not strictly required for breeding itself, workstations are essential for villagers to maintain their professions and trade, which contributes to a healthy and active village.
- Mob Griefing: Ensure mob griefing is enabled, otherwise villagers can’t pick up food.
These elements interact in a complex system, and any imbalance can prevent villagers from breeding. Let’s examine each of these in detail.
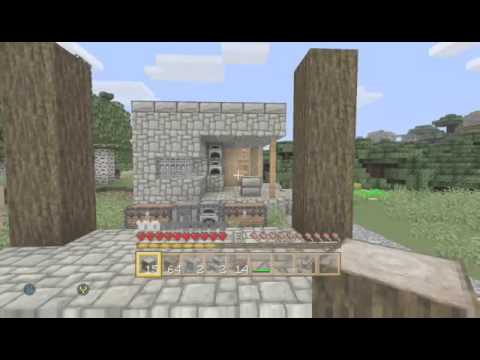
The Bed Requirement: More Than Just a Place to Sleep
Beds are arguably the most critical component of villager breeding. Each villager, including potential offspring, requires an unclaimed bed within the village boundaries. This means you need more beds than the current number of villagers. The game mechanics require that the villagers can pathfind to these beds; simply placing beds in a room isn’t always enough. Obstructions, even seemingly minor ones, can prevent a villager from claiming a bed. Furthermore, beds must be placed inside a valid village boundary.
Consider these points when setting up your villager breeding area:
- Ensure there are enough beds for all current villagers and the number of villagers you want to breed.
- The beds must be accessible. Villagers need a clear path to the beds.
- Beds must be within the village boundary (defined by the location of beds, workstations and villagers).
Food, Glorious Food: Fueling the Villager Population Boom
Villagers need to be willing to breed, and this willingness is directly tied to their food supply. Villagers need to have 12 food (represented as food points) in their inventory to become willing. They will pick up food items thrown at them or dropped near them. The most efficient foods to use are:
- Bread (3 food points per item)
- Carrots (3 food points per item)
- Potatoes (3 food points per item)
- Beetroots (3 food points per item)
To initiate breeding, you’ll need to provide each villager with enough food to reach the 12 food point threshold. A common and effective method is to throw stacks of carrots or bread at the villagers until you see hearts appear above their heads, indicating they are willing to breed. Remember that villagers will share food with each other, so you don’t necessarily need to feed each villager individually. According to expert Minecraft players, a good strategy is to create a small farm nearby managed by a farmer villager. The farmer will harvest crops and share them with other villagers, naturally promoting breeding.
Workstations: Maintaining a Productive Village
While not directly necessary for the breeding process itself, workstations play a crucial role in the overall health and functionality of your village. Workstations allow villagers to claim professions, which in turn allows them to trade with the player. Trading is an excellent way to acquire valuable resources and emeralds. Moreover, a village with active, employed villagers feels more alive and dynamic. Some workstations include:
- Composter (Farmer)
- Cartography Table (Cartographer)
- Fletching Table (Fletcher)
- Grindstone (Weaponsmith)
- Lectern (Librarian)
- Smithing Table (Toolsmnith)
- Stonecutter (Stone Mason)
Ensure you have a variety of workstations available in your village to provide different professions and trading opportunities.
Troubleshooting Common Villager Breeding Problems
Even with a solid understanding of the core mechanics, you may still encounter issues preventing your villagers from breeding. Here are some common problems and their solutions:
- Not Enough Beds: Double-check that you have enough unclaimed beds for all current and future villagers.
- Bed Accessibility: Ensure villagers can pathfind to the beds without obstructions.
- Insufficient Food: Make sure villagers have enough food to become willing. Throw stacks of bread, carrots, potatoes, or beetroots at them.
- Village Boundary Issues: Verify that the beds are within the defined village boundary.
- Mob Griefing Disabled: If mob griefing is disabled, villagers cannot pick up food.
- Too Many Villagers: If you have reached the mob cap for your area, no more villagers can spawn. Try expanding your village or moving some villagers to a different location.
- Villager Inventory Full: Sometimes, a villager’s inventory is full. This prevents them from picking up food and becoming willing. Give them some time to use up their resources.
- Negative Reputation: If you have harmed villagers in the past, your reputation may be low. This can affect their willingness to breed. Trading with villagers can improve your reputation.
- Incorrect Game Rules: Some game rules can interfere with villager breeding. Ensure that `doMobSpawning` and `mobGriefing` are enabled.
- Lighting: Ensure your villager breeding area is well lit to prevent hostile mobs from spawning, which can scare the villagers.
Advanced Techniques for Optimizing Villager Breeding
Once you have a basic villager breeding setup, you can employ advanced techniques to optimize the process and maximize your villager output:
- Iron Farm Integration: Combine your villager breeder with an iron farm to create a self-sustaining resource loop. The villagers will breed, and the iron golems spawned by the villagers will provide a steady supply of iron.
- Villager Trading Hall: Build a dedicated trading hall where you can easily access and trade with all your villagers. This allows you to efficiently acquire resources and emeralds.
- Automatic Food Delivery System: Design an automated system to deliver food to your villagers, ensuring they are always willing to breed. This can involve using hoppers, minecarts, or water streams.
- Breeding Cages: Isolate a pair of villagers to ensure they are the only ones breeding. This can be useful for controlling the population and ensuring specific villager types are produced.
The Role of Chunk Loading in Villager Breeding
Chunk loading is a critical, often overlooked aspect of villager breeding. In Minecraft, the world is divided into 16×16 block areas called chunks. Only chunks that are loaded (active in memory) are processed by the game. If the chunks containing your villager breeder are unloaded, the breeding process will halt. There are a few ways to ensure your villager breeder remains chunk loaded:
- Staying Nearby: The simplest method is to remain within a certain radius of your villager breeder. The game automatically loads chunks around the player.
- Spawn Chunks: The area around the world spawn point is always loaded. If you build your villager breeder near the spawn point, it will always be active.
- Chunk Loading Devices: More advanced players use chunk loading devices, such as nether portals or command block contraptions, to force specific chunks to remain loaded even when the player is far away.
Understanding chunk loading is essential for ensuring your villager breeder operates continuously, even when you’re exploring other parts of your world. According to leading Minecraft technical experts, properly managing chunk loading can significantly increase villager breeding efficiency.
The Impact of Villager Breeding on Your Minecraft World
Successful villager breeding has a profound impact on your Minecraft world, offering numerous benefits:
- Resource Acquisition: Villagers provide access to a wide range of resources through trading, including rare and valuable items.
- Automation: Villagers can be used in various automated farms, such as iron farms, crop farms, and raid farms.
- Defense: A large villager population can provide a buffer against hostile mobs, as iron golems will spawn to protect them.
- Aesthetic Appeal: A thriving village adds a sense of life and activity to your Minecraft world.
However, it’s important to manage your villager population carefully to avoid overcrowding and lag. Consider building multiple villages or moving excess villagers to different locations.
Expert Tips for Successful Villager Management
Effective villager management goes beyond simply breeding them. Here are some expert tips to help you maintain a healthy and productive villager population:
- Protect Your Villagers: Build walls and defenses to protect your villagers from hostile mobs.
- Provide Adequate Housing: Ensure your villagers have enough beds and workstations to prevent overcrowding and unhappiness.
- Monitor Villager Health: Keep an eye on your villagers to ensure they are not being attacked or injured.
- Trade Regularly: Trading with villagers is essential for maintaining their professions and acquiring valuable resources.
- Cure Zombie Villagers: Curing zombie villagers provides a significant discount on their trades, making them even more valuable.
Unlocking Your Village Potential
Mastering villager breeding in Minecraft is a rewarding endeavor that unlocks a wealth of possibilities. By understanding the core mechanics, troubleshooting common issues, and employing advanced techniques, you can create a thriving village that provides valuable resources, automation, and a sense of community. So, get out there, build those beds, throw those carrots, and watch your villager population explode! The knowledge shared here, based on extensive Minecraft experience, aims to empower players to solve the frustrating question of why villagers won’t breed and transform their in-game worlds.
