Mastering Glock 19 Disassembly: A Step-by-Step Guide to Slide Removal
The Glock 19 is renowned for its reliability, simplicity, and ease of maintenance. A crucial aspect of Glock 19 maintenance is understanding how to safely and efficiently remove the slide. Whether you’re cleaning your firearm, performing routine maintenance, or installing aftermarket parts, knowing how to remove the slide from your Glock 19 is an essential skill for any Glock owner. This comprehensive guide will provide you with a detailed, step-by-step walkthrough, ensuring you can confidently and safely disassemble your Glock 19. This guide emphasizes safety protocols, proper techniques, and valuable insights to ensure a smooth disassembly process.
In this article, we’ll go beyond the basic steps, offering in-depth explanations and addressing common issues encountered during slide removal. We’ll cover everything from safety checks to troubleshooting, ensuring you have a complete understanding of the process. By the end of this guide, you’ll possess the knowledge and confidence to disassemble your Glock 19 with ease.
Understanding the Glock 19’s Design and Function
The Glock 19, a striker-fired, semi-automatic pistol, has earned a reputation for its robust design and straightforward operation. Its popularity stems from its reliability, ease of use, and relatively simple construction. Understanding the basic components of the Glock 19 is crucial before attempting any disassembly. The major components include the frame, slide, barrel, and recoil spring assembly.
The slide, which houses the barrel, firing pin, and extractor, is the part we’ll be focusing on in this guide. Removing the slide allows access to these internal components for cleaning, inspection, and maintenance. The Glock’s design allows for easy disassembly without the need for specialized tools, contributing to its appeal among gun owners. The simplicity of the Glock system makes field stripping a straightforward process, but attention to detail and adherence to safety protocols are paramount.
The Glock 19’s design has remained remarkably consistent over the years, a testament to its effectiveness. While newer generations may incorporate minor modifications, the core disassembly process remains largely unchanged. This consistency allows Glock owners to easily transfer their knowledge and skills from one generation to another.
Essential Safety Precautions Before Disassembly
Safety is paramount when handling any firearm. Before you even think about how to remove the slide from your Glock 19, take these crucial safety precautions:
- Always treat every firearm as if it is loaded. This is the golden rule of gun safety.
- Point the muzzle in a safe direction. Ensure the muzzle is pointed away from yourself and any other person. A safe direction typically means towards the ground or a designated backstop.
- Remove the magazine. Press the magazine release button and remove the magazine from the firearm.
- Visually and physically inspect the chamber. Rack the slide multiple times to ensure no rounds remain in the chamber. Visually inspect the chamber to confirm it is empty. Physically check by running your finger (carefully!) along the chamber to ensure there are no rounds present.
- Dry fire in a safe direction. Once you are 100% certain the firearm is unloaded, point it in a safe direction and pull the trigger. This releases the striker and allows for slide removal.
These safety checks are not optional; they are essential for preventing accidental discharges and ensuring a safe disassembly process. Neglecting these steps can have catastrophic consequences. Double-check everything before proceeding.
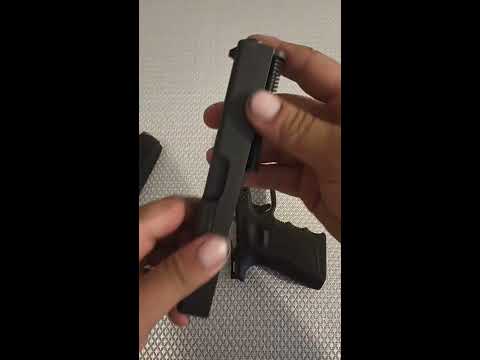
Step-by-Step Guide: Removing the Slide from a Glock 19
Now that you’ve taken the necessary safety precautions, you’re ready to remove the slide from your Glock 19. Follow these steps carefully:
- Grip the slide firmly. Hold the slide with your non-dominant hand, ensuring a secure grip.
- Pull the slide back slightly. Pull the slide back approximately 1/8 to 1/4 of an inch. You should feel it stop at a specific point.
- Depress the slide lock. Locate the slide lock on both sides of the frame, just above the trigger guard. Simultaneously depress both sides of the slide lock downwards.
- Pull the trigger (if not already done). While holding the slide lock down, pull the trigger. Note: Some find it easier to pull the trigger *before* depressing the slide lock. Experiment to see what works best for you, but always ensure the firearm is unloaded before pulling the trigger.
- Release the slide lock and ease the slide forward. With the slide lock depressed and the trigger pulled, gently ease the slide forward off the frame.
If the slide doesn’t come off smoothly, don’t force it. Double-check that you have fully depressed the slide lock and that the trigger is pulled. If you’re still having trouble, refer to the troubleshooting section below.
Detailed Explanation of Each Step
Let’s break down each step in more detail to ensure clarity:
- Grip the slide firmly: A solid grip is essential for maintaining control of the firearm during disassembly. Ensure your hands are dry and free of any lubricants.
- Pull the slide back slightly: This step aligns the slide with the frame, allowing the slide lock to function properly. The exact distance may vary slightly depending on the Glock generation.
- Depress the slide lock: The slide lock is a crucial component that secures the slide to the frame. Depressing it disengages the lock, allowing the slide to move forward. Make sure to depress both sides simultaneously and fully.
- Pull the trigger (if not already done): Pulling the trigger releases the striker, which is necessary for removing the slide. As mentioned before, it is safe to pull the trigger at this point only because you have already verified that the firearm is unloaded and pointing in a safe direction.
- Release the slide lock and ease the slide forward: Gently ease the slide forward, guiding it off the frame. Avoid forcing the slide, as this could damage the firearm.
Troubleshooting Common Issues During Slide Removal
Even with careful adherence to the steps, you might encounter some issues during slide removal. Here are some common problems and their solutions:
- Slide won’t move forward: This is often caused by not fully depressing the slide lock or not pulling the trigger. Double-check these steps and try again. Make sure your grip is firm and even on both sides of the slide lock.
- Slide feels stuck: Ensure the slide is pulled back to the correct position. If it’s too far back or not far enough, the slide lock won’t disengage properly.
- Slide lock is difficult to depress: This can be due to dirt or debris buildup. Clean the area around the slide lock and try again. A small amount of gun oil may also help.
- Recoil spring feels tight: The recoil spring can sometimes create resistance. Apply gentle but firm pressure to ease the slide forward.
If you’re still experiencing difficulties, consult a qualified gunsmith or refer to the Glock owner’s manual. Avoid using excessive force, as this could damage your firearm.
Cleaning and Maintenance After Slide Removal
Once you’ve removed the slide, you have access to the internal components for cleaning and maintenance. Regular cleaning is essential for maintaining the reliability and longevity of your Glock 19.
Here’s a basic cleaning procedure:
- Clean the barrel: Use a bore brush and cleaning solvent to remove any fouling or residue from the barrel.
- Clean the slide: Wipe down the slide with a clean cloth and solvent, paying attention to the firing pin channel and extractor.
- Clean the frame: Wipe down the frame with a clean cloth.
- Lubricate the necessary parts: Apply a small amount of gun oil to the slide rails, barrel, and other moving parts. Avoid over-lubricating, as this can attract dirt and debris.
- Reassemble the firearm: Follow the steps in reverse order to reassemble the slide onto the frame.
Regular maintenance, including cleaning and lubrication, will help ensure your Glock 19 performs reliably for years to come. Consult your owner’s manual for specific lubrication points and recommended cleaning products.
Reassembling the Glock 19: Putting It All Back Together
Reassembling your Glock 19 is essentially the reverse of the disassembly process. Here’s a step-by-step guide:
- Align the slide with the frame. Ensure the slide is oriented correctly, with the muzzle facing forward.
- Slide the slide onto the frame rails. Guide the slide onto the frame rails, ensuring it moves smoothly.
- Pull the slide back until it clicks. Pull the slide back until it clicks into place. You should hear and feel a distinct click, indicating that the slide is properly seated.
- Perform a function check. Rack the slide several times and pull the trigger to ensure the firearm is functioning correctly.
If the slide doesn’t seat properly, don’t force it. Double-check that the slide is aligned correctly and that there are no obstructions. If you’re still having trouble, consult a qualified gunsmith.
Understanding Different Glock Generations and Their Impact on Disassembly
Glock has released several generations of its pistols, each with slight variations in design. While the core disassembly process remains largely the same, there are some minor differences to be aware of.
- First and Second Generation Glocks: These early models have a simpler design but the slide removal process is essentially the same as later generations.
- Third Generation Glocks: Introduced finger grooves and a universal accessory rail. Disassembly remains the same.
- Fourth Generation Glocks: Features a redesigned grip texture and a modular backstrap system. The slide lock may feel slightly different.
- Fifth Generation Glocks: Incorporates several internal changes, including a smoother trigger and an improved barrel. Slide removal is very similar to previous generations, but the internal components have been refined.
Regardless of the generation, always refer to your owner’s manual for specific instructions and safety precautions. While the differences are minor, understanding them can help you avoid potential issues during disassembly and reassembly.
The Importance of Professional Gunsmithing for Complex Issues
While this guide provides a comprehensive overview of how to remove the slide from your Glock 19 and perform basic maintenance, it’s important to recognize the limitations of DIY repairs. For complex issues or modifications, consulting a qualified gunsmith is always the best course of action.
A gunsmith has the expertise, tools, and training to diagnose and repair firearm problems safely and effectively. Attempting complex repairs without the necessary knowledge and skills can damage your firearm or create a safety hazard.
Some situations where a gunsmith is recommended include:
- Malfunctions you can’t diagnose: If your Glock 19 is experiencing malfunctions that you can’t identify the cause of, a gunsmith can help.
- Damaged parts: Replacing damaged parts, especially internal components, often requires specialized tools and knowledge.
- Modifications: If you’re considering making significant modifications to your Glock 19, consult a gunsmith to ensure the modifications are safe and reliable.
Beyond the Basics: Advanced Glock 19 Disassembly and Customization
Once you’re comfortable with basic slide removal, you might be interested in exploring more advanced disassembly and customization options. This could involve replacing the trigger, installing a new barrel, or upgrading the sights.
However, it’s crucial to approach these tasks with caution and proper research. Modifying your Glock 19 can affect its reliability and safety. Always use high-quality parts and follow the manufacturer’s instructions carefully.
Some common customizations include:
- Trigger upgrades: Replacing the factory trigger with an aftermarket trigger can improve the feel and performance of your Glock 19.
- Barrel upgrades: Installing a new barrel can improve accuracy and reliability.
- Sight upgrades: Upgrading the sights can improve your aiming accuracy.
- Slide modifications: Milling the slide for optics or adding custom serrations.
Always prioritize safety and reliability when customizing your Glock 19. If you’re not comfortable performing these tasks yourself, consult a qualified gunsmith.
The Future of Glock Maintenance and User Modifications
The Glock platform continues to evolve, with ongoing refinements in design and manufacturing. As new generations are released, the ease of maintenance and user modifications remain key considerations. Advancements in materials and manufacturing processes are likely to further enhance the durability and reliability of Glock pistols, reducing the need for frequent maintenance. Simultaneously, the aftermarket support for Glocks will likely continue to grow, offering users an ever-expanding range of customization options.
However, it’s essential to stay informed about the latest safety guidelines and best practices. Always refer to the manufacturer’s instructions and consult with qualified professionals when performing any maintenance or modifications. The future of Glock ownership lies in responsible gun ownership and a commitment to continuous learning.
Empowering Glock Owners Through Knowledge and Skill
Mastering how to remove the slide from your Glock 19 is more than just a mechanical skill; it’s about empowering yourself as a responsible gun owner. By understanding the inner workings of your firearm, you can better maintain its reliability, ensure its safety, and appreciate its engineering. This knowledge fosters confidence and allows you to handle your Glock 19 with proficiency.
We encourage you to practice the steps outlined in this guide, always prioritizing safety and attention to detail. Share your experiences and insights with fellow Glock owners, fostering a community of informed and responsible gun enthusiasts. Together, we can promote safe gun handling practices and ensure the longevity of these iconic firearms. Feel free to share your experiences with maintaining your Glock 19 in the comments below.
